Of all of the WooCommerce store setups I’ve seen over the years, there’s one glaring weak point: a checkout page that kills conversions. Cart abandonment rates are high for e-commerce, but your WooCommerce store may perform worse due to the default checkout design. For this this CheckoutWC review, I’ll examine whether this plugin can reverse those statistics.
CheckoutWC Review: Fast Facts
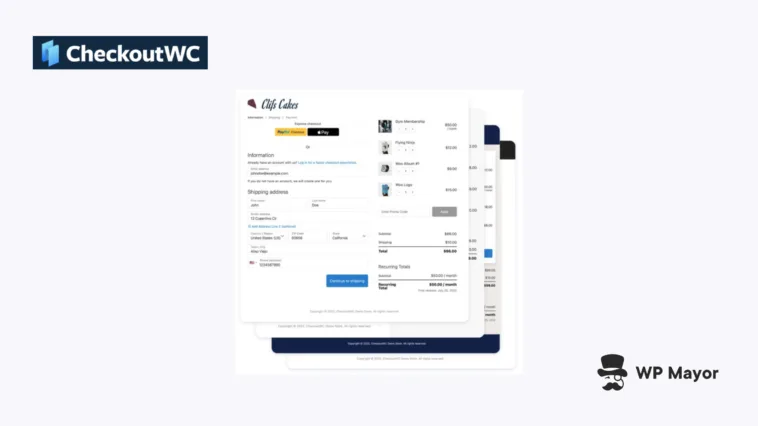
- CheckoutWC replaces the default WooCommerce checkout with a React-based, conversion-optimized alternative that’s super quick to set up (ideal for an agency!)
- The plugin includes order bumps that could increase your Average Order Value (AOV) and abandoned cart recovery email notifications, among more functionality.
- It includes a ‘rules engine’ for targeting order bumps and trust badges based on cart contents or customer history.
- The plugin starts from $23 per month or $199 per year.
CheckoutWC Review: Pricing That Scales

CheckoutWC offers four pricing tiers for different business stages:
- Basic ($23 per month or $199 per year). The entry tier includes core functionality for small stores and solo entrepreneurs: one site license, five checkout templates, and full support for a year.
- Plus Plan ($53 per month or $499 per year). This tier adds a feature set for growing stores and freelancers: five site activations, up to two order bumps, two abandoned cart emails, all checkout templates, and a few more goodies.
- Pro Plan ($73 per month or $699 per year). This tier adds features for stores with plans to scale: ten site activations, no restrictions on order bumps or abandoned cart emails, and free multisite activations for translations.
- Agency Plan ($299 per month or $2,999 per year). This top plan provides flexibility if you manage client sites often: 50 site activations, priority support, and all available functionality.
You can test CheckoutWC out for free through the WordPress Plugin Directory. This lets you visualize how your checkout will look on the front-end along with customizing some basic options. For premium purchases, you have a 30-day money-back guarantee.
CheckoutWC Review: The Core Benefits
Cart abandonment for e-commerce is already high and CheckoutWC addresses the WooCommerce checkout problem through design and conversion improvements.

Instead of spraying form fields and options on the customer, CheckoutWC uses a progressive, focused interface to remove friction points throughout the purchase journey

For instance, trust building is central for improving conversions and new buyers need reassurance before they enter payment details. To help, CheckoutWC integrates trust badges into the checkout flow. These badges display security seals, payment provider logos, and guarantees at key points.

Your store’s mobile experience should already be solid, but CheckoutWC rebuilds elements of the checkout for touch interfaces. The design includes larger buttons, simplified navigation, and a collapsible cart summary that maximizes the screen’s space. It means your store won’t have any excuses for losing a customer due to the smaller viewport.
All in, these benefits (and more) translate into measurable results. The streamlined checkout reduces the number of steps between cart and completion, while the built-in optimization eliminates the need for multiple plugins. On the whole, the streamlining of the setup and customization process will be tempting if you’re an agency. Regardless, let’s take a look at the entire feature set in greater detail.
CheckoutWC Review: Key Features That Matter
CheckoutWC consolidates functionality that you’d typically need multiple extensions for. However, at the base is a set of flexible checkout templates to use a starting point for your own designs:

The plugin will include a number of pre-built templates based on the premium tier you buy, which you can customize further. You can adjust logos, colors, typography, and more.
What’s more, templates adapt based on your products. For instance, digital stores skip shipping steps, while stores that offer local pickups hide unnecessary fields.
The dedicated side cart replaces the WooCommerce cart page to help reduce steps in the purchasing flow. As such, customers can modify quantities, remove items, and apply discount codes without leaving the checkout.

The plugin also supports customers skipping the checkout form to use Apple Pay, Google Pay, PayPal, or Amazon Pay. It’s yet another way CheckoutWC aims to reduce the checkout time from minutes to seconds.
There are elements that target conversions too. You can add suggested products carousels within the side cart, free shipping progress bars, and even order bumps in multiple locations.

Order bumps present offers during checkout based on customer purchases, including targeting logic. For example, you can show bumps when customers buy certain quantities, reach price thresholds, or based on purchase history.
Each bump supports flat and percentage discounts (along with variations) with control over the display conditions.

When it comes to administration, CheckoutWC includes email recovery for abandoned carts without additional plugins. You can customize email templates, set sending delays, and include incentives to bring customers back. This could be an extra way to recover sales that would otherwise be lost.
CheckoutWC Review: Installation, Setup, and Using the Plugin
The installation and setup process for CheckoutWC is quick and painless. I’d suggest that agencies, solo devs, and similar businesses that have to run multiple sites will like the zippy and friction-free workflow.
First, you need to install and activate the plugin in the typical way, then look to enter your license key. The step-by-step process you follow is a neat onboarding touch:

Next, choose a template, customize your color scheme, and preview the new checkout page.
Choosing a Template
You can select a template from the onboarding screen or head to CheckoutWC > Appearance > Templates:

If you flip over to the Design tab, you can adjust a whole host of options:

The search will be of benefit here, as it will filter the settings based on what you type:

There are some global and theme-specific settings here, such as the ability to upload a logo, customize the header and footer designs, and more. It’s notable that your license allocation doesn’t extend to any sites other than your live one, so you have the freedom to develop on as many sites as you need.
Once you save your changes, you can continue with the setup and preview your checkout through the CheckoutWC > Start Here screen. The final necessary step is to toggle the Activate CheckoutWC Templates switch, otherwise your new checkout won’t display on the front-end.
Adjusting Other Plugin Settings
There are other settings pages too and a lot of your time will focus on the CheckoutWC > Pages screen. You have three tabs here for the checkout, Thank You page, and global options. It’s a good idea to take some time to work through each of these to tailor your installation to your needs.

My recommendation is to look at the following:
- Enable the Thank You page template and adjust the options.
- Decide if you want to use a one page checkout or an order review step.
- Turn on the autocomplete settings for address fields.
- Enable the Order Pay template.
While CheckoutWC works with almost every WooCommerce payment gateway without additional setup, express payment methods need specific gateway support. The CheckoutWC > Express Checkout screen will tell you whether you have the support in place:

For shipping, the plugin will respect your WooCommerce shipping zones and methods. What’s more, local pickup options will display when you configure them in your shipping settings.
CheckoutWC Review: Support and Documentation Quality
CheckoutWC provides multiple support channels for different needs. Self-support is through a dedicated documentation site.

There are several categories here, such as Getting Started guides, Feature documentation, and sections for Developer resources, Troubleshooting, and further Integrations.
Each article includes step-by-step instructions with screenshots and could be all you need to resolve an issue. The developer documentation covers hooks, filters, and customization options for those needing deeper modifications, which includes a visual hook guide:

It’s the sort of attention to detail that I love to see any company provide, and this aspect in particular is near-unique.
For direct support, you can access this through the CheckoutWC > Support screen within WordPress or on the main CheckoutWC website:

The support page displays current average response times, which is a great touch. However, it doesn’t look like this is a current value: I still see the response time from March 2025. Still, the level of transparency here is welcome.
As a side note, I also see the support and development team jumping into comments on WordPress.org tickets – another excellent sign of quality in a plugin.
CheckoutWC Review: Real User Reviews and Ratings
As always, I like to see the real-world performance of any theme or plugin. Some of this is through my own testing, and some is from independent user reviews. For this post, I’m using the developer’s own testimonials and the reviews of users at WordPress.org.
There’s a general theme that one user sums up:
“By far the most important plugin we have for our site. The constant development, fast support, and great community make this plugin 5 stars.” – Michael Savage
The support is something users in non-English speaking countries also rate:
“…they offered great support, even though they were in another country and spoke another language! Thank you here from Brazil 🇧🇷” – mluizuliana
Away from the support, others highlight the whole experience of using the plugin:
“…this plugin has the best user experience, is easy to use, and the free version was useable and provided upgrade options…” – jameslibb
This is also the case for larger companies too:
“…integrating CheckoutWC into our eCommerce site has been a game-changer. The user interface is intuitive, significantly enhancing our customer checkout experience.” – Ashraf Moosa, WiZmed
I have been impressed by the high number of reviews and ratings, especially in comparison to the number of negative reviews I’ve found. It’s a solid foundation for delivering a top-notch WordPress plugin.
My Final Thoughts on CheckoutWC
CheckoutWC works best for stores that experience high mobile traffic and sell to new customers who need trust signals. Further, if you want to increase your AOV through strategic bumps and need a professional checkout design without custom development overheads, this is likely the plugin for you!
Pricing is a definite challenge, especially for smaller or budget-conscious stores, but the conversion improvements could be what you need to generate returns within days. Given the package, this could be a plugin that you run if you handle multiple client sites and have a premium on time. On the whole, if your WooCommerce store has regular sales volume, CheckoutWC represents a high-impact investment in revenue growth.
Related Articles
Does this CheckoutWC review give you food for thought on your own WooCommerce checkout design? Share your opinions in the comments below!