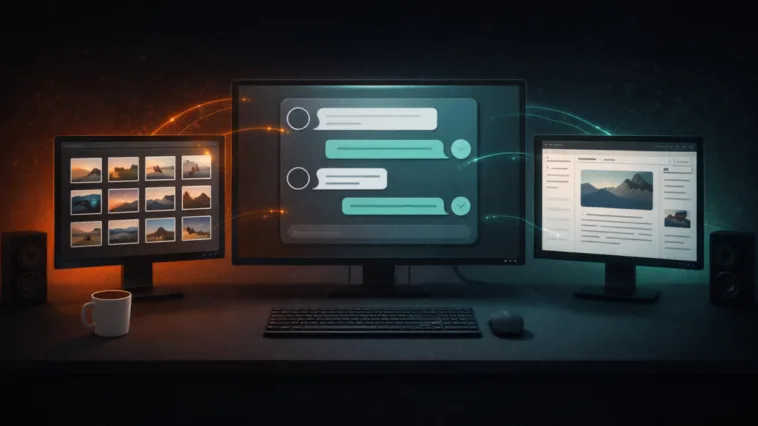
I typed one sentence into a chat box last week. “Create an article about AI trends, find some images, and save it as a draft.”
Then I watched three AI agents coordinate in real time. One searched Pixabay for relevant images. Another wrote a full article with proper headings, embedded visuals, and image credits. A third pushed the whole thing to WordPress as a draft, ready for my review.
The entire process took about 90 seconds. No code. No API wrangling. Just a single natural language command.
In this tutorial, I’ll walk you through building exactly this system using Apteva, an open-source AI agent framework. By the end, you’ll have a working team of three specialized agents (a Coordinator, an Image Agent, and a WordPress Agent) that can research images, write articles, and publish drafts to your WordPress site automatically. In a landscape where staying visible means adapting to AI-driven workflows, having this kind of infrastructure in your toolkit matters.
If you manage content for clients, run a publication, or just want to see what multi-agent AI workflows actually look like in practice, this one’s for you. It’s one of the most practical applications of AI tools for WordPress content creation that I’ve come across.

What You’ll Need
Before we start building, make sure you have these ready:
- An Apteva account (free account or local install) – You can run Apteva locally, or use a hosted account to get started faster
- A WordPress site with admin access
- A Pixabay API key (also free)
- Basic familiarity with the WordPress admin dashboard
Estimated time to complete: ~20 minutes.
Step 1: Install the WordPress MCP Plugin
MCP (Model Context Protocol) is how your AI agents talk to external services. Think of MCP servers as translators that sit between your agents and the tools they need. With AI adoption accelerating across the WordPress ecosystem, this kind of integration is becoming essential. For WordPress, we’ll use a plugin called Stifli Flex MCP that turns your site into an MCP-compatible endpoint.
Log into your WordPress admin dashboard and navigate to Plugins > Add New. Search for “Stifli Flex MCP,” then click Install Now and Activate.

That’s it for the install. One plugin, and your WordPress site is ready to receive instructions from AI agents.
Step 2: Configure MCP Authentication
With the plugin activated, you need to set up secure authentication so Apteva can communicate with your site.
Go to Settings > Stifli Flex MCP in your WordPress admin. You’ll see an authentication section explaining how Application Passwords work. Click Create Application Password and store it somewhere safe.

Take note of two things here. The JSON-RPC 2.0 Endpoint is your base URL. The Endpoint for Claude/ChatGPT includes your username and application password baked into the URL, which makes configuration in Apteva straightforward.
The formatted URL looks something like this:
https://yourname:YOUR_APP_PASSWORD@yoursite.com/wp-json/stifli-flex-mcp/v1/messages
Keep this URL handy. You’ll need it in the next step.
Step 3: Connect Your MCP Servers in Apteva
Now we switch over to Apteva. You need to register two MCP servers: one for WordPress (so agents can create posts) and one for Pixabay (so agents can search for images).
Adding the WordPress MCP Server
In Apteva, navigate to MCP in the left sidebar and click + Add Server. Select HTTP Endpoint as the server type.
Fill in the details:
- Name: WordPress
- Scope: Global (all projects)
- URL: Paste the endpoint URL from Step 2
- Username: Your WordPress username
- Password: Your application password

Click Add Server and you’re connected.
Adding the Pixabay MCP Server
Click + Add Server again, but this time select npm Package as the server type.
Configure it:
- Name: PixaBay
- Scope: Global (all projects)
- npm Package:
pixabay-mcp - Environment Variables: Add
PIXABAY_API_KEYwith your API key as the value

Verifying Your Servers
Navigate back to the MCP page to confirm both servers are running. You should see green status indicators next to each one.

Tip: If a server shows as offline, double-check your credentials. For Pixabay, verify your API key is valid. For WordPress, make sure the Stifli Flex MCP plugin is still activated and your application password hasn’t been revoked.
Step 4: Create the Coordinator Agent
With your MCP servers running, it’s time to build the agent team. We’ll start with the Coordinator, the agent that receives your requests and delegates work to the others.
In Apteva, navigate to Agents in the sidebar. If this is a fresh project, you’ll see an empty state.

Click + New Agent and configure it:
- Name: Coordinator
- Project: WordPress Team
- Provider: Anthropic
- Model: Claude Haiku 4.5 (Fast)
- System Prompt:
You are a coordinator agent.
Under Features, enable Memory (for persistent recall across conversations) and Multi-Agent (so it can communicate with peer agents). Set the Multi-Agent Mode to Coordinator, which means it orchestrates and delegates rather than receiving tasks.

Save the agent. You’ll see it appear in your project.

Step 5: Create the Worker Agents
Now you need two worker agents, each specialized for a different part of the publishing workflow.
The Image Agent
Click + New Agent and configure:
- Name: Image Agent
- Project: WordPress Team
- Provider: Anthropic
- Model: Claude Haiku 4.5 (Fast)
- System Prompt:
You are an image researcher agent.
Enable these features: Memory, Vision (to process and analyze images), MCP (to access external tools), and Multi-Agent. Set the Multi-Agent Mode to Worker (receives delegated tasks).

When you scroll down to the MCP Servers section, select the Pixabay server for this agent.
The WordPress Agent
Create one more agent:
- Name: WordPress Agent
- Project: WordPress Team
- Provider: Anthropic
- Model: Claude Haiku 4.5 (Fast)
- System Prompt:
You are a wordpress agent.
Enable Memory, MCP, and Multi-Agent. Set Multi-Agent Mode to Worker. Assign the WordPress MCP server.
This agent doesn’t need Vision since it’s working with text content. Keep its capabilities focused.
Step 6: Review Your Agent Team
With all three agents created, start each one and verify the team is running.

Here’s a quick summary of how the capabilities break down:
| Agent | Memory | Vision | MCP | Multi-Agent | Mode |
|---|---|---|---|---|---|
| Coordinator | Yes | No | No | Yes | Coordinator |
| Image Agent | Yes | Yes | Yes (Pixabay) | Yes | Worker |
| WordPress Agent | Yes | No | Yes (WordPress) | Yes | Worker |
The Coordinator has no direct tool access. It only knows how to delegate. The workers have narrow, specific capabilities. This separation is deliberate. It keeps each agent focused and reduces the chance of errors.
Step 7: Run Your First Automated Article
Here’s where it all comes together.
Click on the Coordinator agent card to open the chat panel.

Type something like this:
I want you to create a new article about the recent AI trends – all on your own.
Get some images, and then have the article written and wait for publishing.
Hit send. The Coordinator will analyze your request, break it into subtasks, and delegate to the appropriate workers.

Watch the response closely. You’ll see the Coordinator:
- Call the Image Agent to search Pixabay for AI-related visuals
- Call the WordPress Agent to write and save the article
- Report back with a summary of what was created
The whole thing happens in under two minutes.
Verifying the Result in WordPress
Head over to your WordPress admin and check the posts list.

Open the draft to see the full article.

The article includes properly formatted sections, embedded images with credit lines, and a logical content structure. It’s saved as a Draft, so nothing goes live until you review and hit Publish.
That’s the whole point of this system. Agents handle the heavy lifting. You retain editorial control.
Going Further
How the Multi-Agent Architecture Works
The communication flow follows a simple hierarchy:
      User Request
           ↓
   Coordinator Agent
           ↓
   ┌─────────────────┐
   ↓                 ↓
Image Agent    WordPress Agent
(Pixabay MCP)  (WordPress MCP)
You talk to the Coordinator. It delegates to workers. Workers use their MCP tools to complete subtasks. Results flow back up to the Coordinator, which compiles a final response for you.
This pattern scales. You can add more worker agents for SEO analysis, social media posting, email newsletters, or translation. If you’re already familiar with WordPress automation plugins, think of this as the next evolution: agents that don’t just follow rules, but reason about tasks and delegate work. The Coordinator handles the routing.
Customizing Agent Prompts
The system prompts in this tutorial are intentionally minimal. For production use, you’ll want to be more specific.
Here’s an example of a more detailed Coordinator prompt:
You are a content publishing coordinator. When asked to create content:
1. Always search for 4-6 relevant images first
2. Ensure images have proper attribution
3. Create articles with SEO best practices
4. Set status to Draft for human review
5. Notify the user when complete
The more specific your prompts, the more consistent the output.
Adding Other Integrations
The same pattern works for any service with an MCP server or API. You could add LinkedIn, Brevo for email, or custom tools built with Apteva’s SDK. If you’re looking at other approaches to AI-powered automation within WordPress itself, our AI Workflow Automation review covers a plugin that takes a different (but complementary) approach to the same problem.

Troubleshooting
Here are the most common issues and how to fix them.
MCP server won’t connect: Double-check your credentials. For WordPress, make sure the Stifli Flex MCP plugin is activated and your application password is valid. For Pixabay, verify your API key at pixabay.com/api/docs.
Agent shows “stopped” instead of “running”: Click the Start button on the agent card. If it still won’t start, check that Multi-Agent mode is enabled and the correct MCP servers are assigned.
Images not appearing in the article: Confirm the Image Agent has the Pixabay MCP server assigned and that Vision capability is enabled. Also check that your Pixabay API quota hasn’t been exceeded.
WordPress draft not created: Verify the WordPress MCP authentication. The most common issue is an expired or revoked application password. Create a new one from your WordPress profile if needed.
What’s Next?
You’ve just built a multi-agent system that takes a single natural language command and turns it into a researched, illustrated WordPress draft. The Coordinator delegates, the Image Agent sources visuals, and the WordPress Agent handles content creation and publishing.
The real power here is modularity. Need an SEO agent? Create a worker with access to an SEO tool’s MCP server. Want automated translations? Same pattern. The architecture grows with your needs without requiring you to rebuild anything. For a broader look at how AI is reshaping WordPress workflows, check out our roundup of the top WordPress web development AI tools.
I’m curious to see how people push this further. What’s the first workflow you’d automate with a setup like this?