You might be like me, in that I’ve lost count of how many times a WordPress update has given me a headache. We all have those moments where a plugin update breaks your whole site. There might even have been a time when you didn’t make an update, which then exposed a vulnerability. Eventually, we all learn that updates are both essential and dangerous. The Kinsta Automatic Updates functionality is one aspect of the host I’m eager to look at for this reason.
This part of Kinsta’s hosting provision promises to auto-update your themes and plugins while providing a safety net that prevents disasters. As such, I’ll walk you through how to set up, configure, and make the most of something that could transform your WordPress maintenance routine.
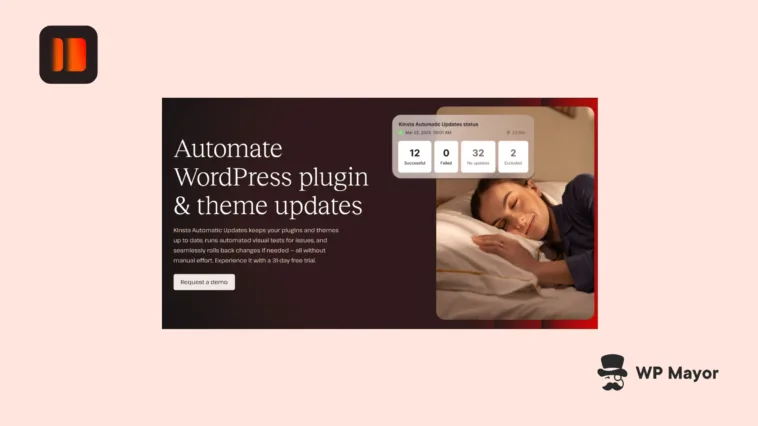
Kinsta Automatic Updates: An Introduction
The ability to auto-update WordPress is a premium add-on service to Kinsta’s typical hosting packages (more of which later). WordPress itself offers native automatic updates, which you get by default for minor core releases, but is available for plugins and themes too.

However, the native solution lacks safety measures. For example, if an update breaks your site, you’re on your own! This is where Kinsta’s solution shines, as it comes with sophisticated safety measures built in, rather than simply being a ‘set-and-forget’ tool.
The Kinsta Automatic Updates functionality brings with it visual regression testing capability. Before it applies updates, Kinsta takes screenshots of your website. After the install, it takes another set of screenshots and compares them at a pixel level. If there’s a visual breakdown, the system automatically rolls back to the pre-update state. After the update, Kinsta will test the five URLs from the Test URLs field and check over the functionality again. On the whole, this can prevent downtime and user-facing errors.
If you maintain multiple WordPress sites, whether as an agency, freelancer, or part of an in-house team, you’ll likely see significant time savings and a reduction in the manual workload to update and secure your sites.
Plans and Pricing
If you’re intrigued by Kinsta Automatic Updates, you’ll first need to be a Kinsta hosting customer—our review looks over the full cost. From there, adding Automatic Updates is simple—just $3 per environment, per month before tax Iif applicable).
However, you have the ability to trial the functionality for 30 days. The dashboard will display a countdown to let you know how long you have left until the billing begins.
WordPress’ Native Updates vs. Kinsta Automatic Updates
The differences between WordPress and Kinsta’s auto updating methodology seem simple on the surface. However, there’s more that goes on under the hood.
Here’s how the two solutions compare:
| Feature | WordPress Native Updates | Kinsta Automatic Updates |
| Cost | Free (built into WordPress) | $3 per month, per environment (first month free) |
| Update Types | Core, plugins, themes, translations | Plugins and themes (core updates remain manual) |
| Visual Testing | None | Automated visual regression testing |
| Rollback Protection | None (manual restore required) | Automatic rollback if visual issues detected |
| Scheduling | Limited control | Customizable scheduling by day and time window |
| Backup Before Updates | None (requires a separate solution) | Automatic backup before updates |
| Reporting | Basic in-dashboard notifications | Detailed logs with before and after screenshots |
| Selective Updates | Global on/off per update type | Fine-grained control per plugin or theme |
| Dynamic Content Handling | None | Can exclude dynamic elements from testing |
| Maintenance Mode | None during updates | Optional maintenance mode during updates |
In a nutshell, Kinsta Automatic Updates includes daily updating for plugins and themes, visual regression testing to detect layout issues, and automatic rollback if there’s a problem.
What’s more, you can access detailed update activity reporting, schedule updates to run during low-traffic periods, and even customize the testing sensitivity. Let’s look at how to set this up on your Kinsta-hosted WordPress site.
How to Enable Kinsta Automatic Updates
Enabling automatic updates on your Kinsta account takes just a few minutes. The first step is to log into your MyKinsta dashboard:

From here, you can either click on a site card at the top of the screen, or navigate to the WordPress sites page to find your website’s settings. Regardless, head to the Plugins and themes tab.

If this is your first time enabling Kinsta Automatic Updates, you can find the card to do so at the top of this screen—click Change here. As an aside, the typical Automatic Updates card is at the bottom of this page.
Choosing Your Update Method

Once you click the Change button, you’ll see a modal dialog with three options available to you:
- Manual. This is the typical option that gives you full control over your updates.
- WordPress auto-updates. If you want to use WordPress’s built-in auto-update functionality, you’ll choose this option.
- Kinsta Automatic Updates. This is what I’m focusing on, of course. It’s the only premium option of the three, and comes with a breakdown of the cost too.
We’ve come this far, so I’ll select the Kinsta Automatic Updates option and click Continue.
Configuring Your Update Settings
Next, you need to configure how updates will run. There are a few settings and options here that I’ll break down so you can choose the right customization for your needs.
Testing Frequency and Testing Time Window
Here, you have checkboxes to choose which days of the week you want updates to run. For instance, if you run an e-commerce website, you might want to avoid busy shopping days. For a business site, weekends might be ideal since traffic is typically lower.

For the Testing Time Window, simply select a two-hour window when updates should run.

A healthy practice is to choose a time with minimal traffic—typically late night or early morning in your primary audience’s time zone. Again, your site and industry will be the biggest factor here.
Sensitivity
Next, you have the Sensitivity slider. This scales from one to five and determines how strict the visual regression test will be.

In short, if you move the slider to the right, you enable a higher rate of issue detection. Here’s a quick summary of what happens:
- Low (around one or two). This only detects major changes, which means fewer false positives but has a tendency to miss subtle issues.
- Medium (three). Most sites will benefit from this balanced approach to regression testing.
- High (four or five). This detects minor visual changes and is more thorough. However, you might see more false positives that will need more administrative focus.
As I suggest, you can leave this at three for now, unless you know another setting will be applicable.
Test URLs
The next section lets you specify the URLs Kinsta Automatic Updates will test. By default, Kinsta will test your homepage plus four random pages.

For better results, I recommend you choose up to five URLs with some criticality to your business:
- Your homepage.
- A key product or service page.
- Your contact or lead generation page.
- A blog post with complex formatting.
- Any page with custom functionality.
If you’re an e-commerce business, for example, you would want to choose one or many product pages to test. If any of these pages have dynamic elements (as many sites do), the next section will be something you want to tweak also.
Hide Selectors and Enable WordPress Maintenance Mode
Lots of sites have dynamic elements such as rotating banners, testimonial carousels, or real-time data. However, they can trigger false positives for visual regression testing. This is where you’ll use the Hide Selectors field.

Essentially, you’ll specify the CSS selectors you want to ignore during testing. For example, if you have a slider with a .hero-slider class, you’d add it to the text field to hide it from the comparison.
Finding these selectors might be tricky in some cases. My advice is to take it slowly, lean on the documentation for all of your plugins and themes, and dig into your browser’s Inspect option or DevTools.
The final checkbox on this screen is to display a maintenance message while updates run.

I’d recommended this for sites where a brief visual glitch could impact the experience. I wonder why this isn’t a default check, because most sites would benefit from displaying a maintenance page when updates run. What’s more, this only appears while those update installs are in progress—not for the entire time of the process.
Confirming Your Selection
Once you complete the fields on this screen, you will see a summary of how Kinsta Automatic Updates will run on your site.

Here, click Continue, review the pricing information, then when you’re ready, click Change automatic updates to activate the service.
Managing Updates for Individual Plugins and Themes
While the global settings apply to all plugins and themes, you might want different rules for specific components. For instance, you might want to exclude a custom plugin or one that requires a manual configuration after you update it.
To do this, head back to the Plugins and themes screen for your site within the MyKinsta dashboard. Next, find the plugin or theme you want to modify, click the kebab menu next to it (the ‘three dots’), and select Change automatic updates from here:

You’ll see the same options available to you as for the global Automatic Updates settings. This gives you plenty of scope to set up your update schedule as fits your exact requirements.
Monitoring Update Activity
At the bottom of the Plugins and themes page is one of the more valuable aspects of Kinsta Automatic Updates. Here you’ll see a comprehensive log of your update activity. This includes the date and time of any updates, which plugins and themes got an update, the success status of the update, and whether a rollback was necessary:

If you want more information about a specific update session, you can click the Details link. This will show you before and after screenshots of your test pages, visual indicators that highlight any differences, and information about the updates that took place.

You can also set up notifications to help inform you about any update activity. You’ll find this option through the User settings link in the top right-hand corner of the MyKinsta dashboard:

Next, navigate to the Notifications tab and under the Automatic Updates section, choose whether you want to receive notifications about either successful or failed updates:

You can build these notifications into those you already have in place, which gives you a valuable, hands-off way to monitor your site.
When Updates Failed: Troubleshooting the Causes
Despite the safeguards, sometimes updates might fail or produce false positives. For instance, a failure due to your dynamic content will show consistent failures on the same pages despite no actual problems. The solution is to check the visual comparison, identify the dynamic elements causing differences, add their CSS selectors to the Hide selectors field, and consider adjusting the sensitivity level downward.
However, if the system doesn’t detect important visual changes, you might find updates passing their tests but causing actual visual problems on your site. To address this, increase the sensitivity level, add more specific test URLs that include the affected areas, and consider enabling maintenance mode during updates so you can verify changes after.
Finally, for updates that never complete, check if your update window overlaps with Kinsta’s maintenance period (2:00–5:00am local time in your data center’s timezone).
Kinsta Automatic Updates is Worth Your Attention!
For $3 per environment, per month (after the free first month, remember), Kinsta Automatic Updates provides invaluable peace of mind and time savings. The combination of automated updates, visual regression testing, and automatic rollbacks addresses the most significant pain point in WordPress maintenance: updating your site without breaking it.
When you factor in the time saved from manual updates and potential costs avoided from update-related disasters, The service essentially pays for itself if you factor in the time you save, and with the first month free, you can thoroughly test it before committing.
Does Kinsta Automatic Updates sound like a solid addition to your hosting package? I’m looking forward to hearing your opinions in the comments section below!