Visitors decide whether or not to donate in seconds. If they can see that others are already contributing and the goal is within reach, they’re far more likely to take action.
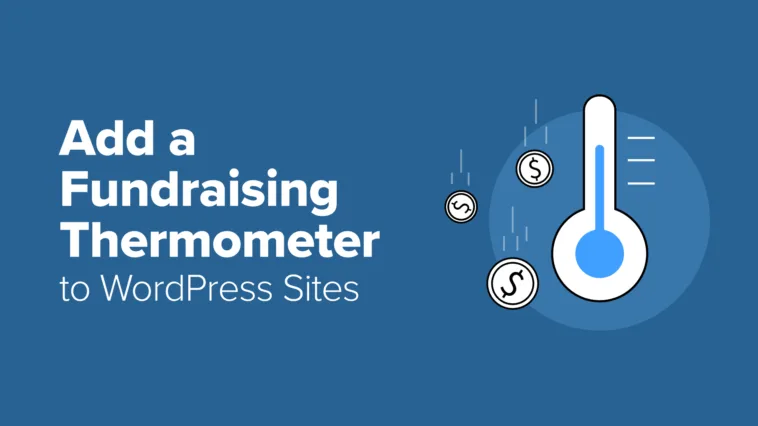
A fundraising thermometer can help with that. It turns your campaign into something people can see and connect with, generating excitement as the donation total moves closer to your target.
I’ve tested several WordPress fundraising plugins that can add this feature, and a few make it incredibly easy. They update totals automatically and fit right into any donation form or landing page.
In this guide, I’ll show you the quickest way to add a fundraising thermometer to your WordPress site so you can get more donations for your nonprofit.

💡Quick Answer: How to Add a Fundraising Thermometer in WordPress
If you just want to find the solution quickly, here’s a simple rundown of your options:
- Charitable plugin (Recommended): Ideal for nonprofits that want a full-featured donation system. Has built-in fundraising thermometers, donor tracking, and payment integrations.
- Donation Thermometer plugin (Free): Great for a lightweight, standalone thermometer. Uses shortcodes, fully customizable, but you’ll need to update the amounts manually.
- Formidable Forms (Advanced): Ideal for complex donation forms with fundraising thermometers. Includes a Charity Tracker template, supports multiple payment gateways, and lets you create multiple progress bars for your campaigns.
This quick overview helps you decide which method fits your needs before diving into the step-by-step setup for each option.
What Is a Fundraising Thermometer?
A fundraising thermometer is a simple visual tool that shows how close you are to reaching your donation goal. It looks like a regular thermometer, and the bar fills up as more donations come in.
It’s an easy and fun way to show supporters the progress of your campaign.
For example, if your goal is $5,000 and you’ve raised $2,500, the thermometer will show that you’re halfway there.
You can display a fundraising thermometer on your homepage, donation page, or in a campaign widget on the sidebar.

You can even add it directly inside your donation form so that donors see the progress while giving. Or you can show on a separate page on your website to encourage more donations.
Depending on the plugin you use, it can also update automatically as donations are received, helping visitors see the progress in real time.
How Does a Fundraising Thermometer Boost Donations?
A fundraising thermometer isn’t just for improving your nonprofit web design — it actually helps you raise more money. I’ve seen this work on many nonprofit websites, and there are a few reasons why:
- Goal Gradient Effect: People like to see progress. That’s why when a campaign gets close to its goal, supporters feel more motivated to give. I’ve noticed that donations often pick up speed once the bar passes 70% of the goal.
- Social Proof: When visitors see other people donating, it builds trust. They think, “If others are giving, it must be worth it.” That’s social proof in action.
- Instant Motivation: A thermometer gives donors quick motivation. Seeing the bar rise after each donation feels rewarding and encourages more people to help. In fact, studies show that visual progress indicators like fundraising thermometers can increase donations by 15–30%.
Now, I’ll show you 3 effective ways to add fundraising thermometers in WordPress.
You can use the links below to jump to the method of your choice:
Method 1: Add a Fundraising Thermometer With Charitable (Best Overall Option for Nonprofits)
If you’re looking for the best way to accept donations, run fundraising campaigns, and display a fundraising thermometer in WordPress, then I recommend using Charitable.
It’s an all-in-one donation plugin made for nonprofits, and it comes with everything you need to create and track fundraising campaigns.

Here are a few key features that make Charitable stand out:
- Built-in progress tracking: See exactly how close you are to your goal.
- Automatic updates: The thermometer fills up as donations are received.
- Donor management tools: Keep track of all your donors in one place.
- Automation options: Send thank-you emails, manage recurring donations, and more.
With all these features, the tool saves you time while keeping your fundraising campaigns visually engaging. If you want more details, take a look at our complete Charitable review.
Step 1: Install Charitable on Your WordPress Site
First, you need to install and activate the free Charitable plugin. For details, just follow our tutorial on installing a WordPress plugin.
Note: Charitable offers a free plan, which lets you add a fundraising thermometer (progress bar) to your donation forms.
However, if you want access to more campaign templates, extra payment gateways, and advanced features like peer-to-peer fundraising, I recommend upgrading to the Pro version.
If you choose the Pro plugin, then you will also need to enter your license key. To do this, head over to the Charitable » Settings page from the WordPress dashboard and paste it into the ‘License Key’ field.

You can get this information from your account on the Charitable website.
Step 2: Add a New Donation Campaign
Now it’s time to create your first fundraising campaign. For this, go to the Charitable » Add New page from your WordPress dashboard.
Start by giving your campaign a name. I suggest choosing something short and clear, like ‘Help Build Our Community Library’ or ‘Support Local Animal Rescue.’
This name will appear on your donation form and campaign page, so make sure it’s something your visitors can easily recognize.

Next, choose a campaign template. Charitable offers several pre-built options, and each one has a different layout and goal style.
For example, you might see Animal Sanctuary, Disaster Relief, Medical Causes, or Environmental.
To find out if a template already includes a built-in fundraising thermometer, simply click the ‘Preview’ button before selecting it. This helps you pick the design that fits your campaign best.
But if your chosen template doesn’t include a thermometer, don’t worry. You can easily add one to any template using the drag-and-drop builder.

Once the Campaign Builder opens up, you’ll see a form preview on the right with form fields in the left column. Simply drag and drop these fields to rearrange, edit, or remove them.
You can also add images, videos, and a short description to tell your story and inspire people to give.
Plus, you can customize fields like donation amount, donor name, email, and payment options to fit your campaign. Everything is editable, so you can design the form exactly how you want.
For more details, see our full tutorial on how to create a recurring donation form in WordPress. It explains how to add advanced fields and options to make your forms more flexible.

Step 3: Add and Customize Your Fundraising Thermometer
Charitable makes it super easy to add a fundraising thermometer to any of your donation forms. It comes with a built-in Progress Bar field that you can drag and drop into the form preview.
You can place it anywhere you want — at the top of the form (great for visibility), just above the donate button (to motivate donors before giving), or at the bottom (to wrap up the form with a sense of progress).

Once you add the Progress Bar field, click on it to open its settings in the left column.
Here, you can start by adding a headline for your fundraising thermometer. This text appears right above your progress bar, so use something clear like ‘Our Goal So Far’ or ‘Help Us Reach $5,000.’
This helps donors immediately understand what the bar represents.
Next, toggle on the switches for ‘Show Donated’ and ‘Show Goal.’ These options display your total raised amount and your overall goal.
If you leave one turned off, then the progress bar will still work, but it won’t feel as complete. For example, you can hide the goal if you want to keep the number private.
But I recommend keeping both switches on so donors can clearly see how close you are to reaching your target.

After that, scroll down to the ‘Goal Label’ field. This is the text that appears beside your fundraising thermometer to show donors what you’re aiming to achieve.
For example, you might write Goal: or Our Target: — the actual goal amount (like $5,000) will appear automatically next to this label once you’ve set it up later in the settings.
Below that, you’ll see the ‘Donate Label’ field. This text appears next to the amount your campaign has already raised. You can customize it to say something like Raised so far: or Donations collected: depending on your tone or style.
The amount next to this label will update automatically every time a donation is received, so you don’t need to edit it manually.
You can also adjust the width and alignment options to make sure your fundraising thermometer fits seamlessly into your form’s layout.

Finally, switch to the ‘Advanced’ tab at the top to customize the look of your thermometer.
Here, you can choose the style, size, and theme colors to match your website’s design or campaign branding.

Step 4: Set a Goal for Your Fundraising Thermometer
Now that your thermometer has been added to your donation form, it’s time to set your fundraising goal and configure other important campaign settings.
Switch to the Settings » General Settings tab from the left column. Here, you can set your fundraising goal in the ‘Goal’ field.
This sets the target your thermometer will measure against. It updates automatically as donations come in, so donors see real-time progress.
I also suggest setting an end date for your campaign. Adding a clear deadline helps create a sense of urgency because people are more likely to donate when they know time is running out.

Next, go to the Marketing tab to connect your campaign with your favorite email marketing service like Constant Contact or Drip.
This lets you automatically follow up with donors, send thank-you emails, or share updates about your campaign’s progress.
💡 Pro Tip: Make sure your email notifications reach donors’ inboxes by setting up WP Mail SMTP. It improves email deliverability so that your confirmation emails, receipts, and updates don’t end up in spam.
To get started, see our tutorial on how to configure your email settings properly.

Finally, switch to the Payments tab to connect your preferred payment gateways — such as Stripe, PayPal, or Braintree. Once connected, donors can securely give on your website through your donation form.
For step-by-step instructions, check out our guide on how to accept international donations in WordPress.

Step 5: Launch Your Fundraiser Campaign
Once your campaign looks good, it’s time to make it live.
To do this, switch the form to ‘Publish’ and click the ‘Save’ button to store your changes.

After that, you can embed your fundraising form anywhere using the Charitable block in the block editor.
Just open any page or post, add the ‘Charitable Campaign’ block, and select your campaign from the dropdown.

When you’re done, click the ‘Update’ or ‘Publish’ button to save your settings.
Here’s a quick preview of how your fundraising thermometer might look on your site:

Step 6: Manage and Track Your Fundraising Thermometer
You can also easily monitor your campaign’s performance right from your WordPress dashboard.
Just go to Charitable » Donations, where you’ll see each campaign listed along with its fundraising thermometer showing real-time progress.

You can also visit the Reports page to get a detailed overview of your fundraiser’s performance after adding the thermometer.
Here, you’ll find charts and key stats like total donations, total donors, average donation amount, and more — giving you a clear picture of how your campaign is doing.

If you ever need to make changes, you can update your fundraising goal or extend the campaign’s end date from the campaign settings.
This flexibility helps you keep the momentum going and adjust your targets as your fundraiser grows.
Method 2: Add a Fundraising Thermometer With the Donation Thermometer Plugin (Best Free Option)
If you just want a quick and free way to show your fundraising progress, then the Donation Thermometer plugin is a great pick.
It’s lightweight, super easy to use, and won’t slow down your site. Just note that you’ll need to manually update the amount raised as your donations come in.
I recommend this method for small community fundraisers, school projects, or personal charity drives that don’t require features like donor tracking or payment integrations.
Step 1: Install and Activate the Donation Thermometer Plugin
You can start by installing and activating the Donation Thermometer plugin.
To do this, head over to the Plugins » Add New page and search for ‘Donation Thermometer.’

For detailed instructions, you can also see our guide on how to install a WordPress plugin.
Step 2: Set Your Fundraising Targets
Upon plugin activation, go to the Settings » Thermometer page from your WordPress dashboard. Here, you will set up the goal for your fundraising thermometer.
In the ‘Thermometer Values’ section, start by entering your ‘Target Value’. This is the total amount you want to raise for your campaign (for example, 50000).
Next, enter your ‘Raised Value’, which shows how much has already been collected (for example, 25000). If you haven’t raised any money yet, you can leave this field blank for now.

Just keep in mind that this plugin does not update the raised amount automatically.
Each time you receive a donation, you will need to return to the settings page. Then, manually update the ‘Raised Value’ field to reflect your current progress.
Step 3: Customize the Appearance of Your Fundraising Thermometer
After setting your fundraising goal and raised amount, it’s time to adjust a few key settings that make your thermometer easy to read and visually appealing.
Start with the thermometer orientation.
You can choose portrait (vertical) or landscape (horizontal), but portrait usually looks best and feels familiar to most visitors.

Next, make sure to show the percentage, target, and amount raised by selecting ‘True’ from the dropdown menu.
The percentage gives donors a quick visual look at how close you are to your goal, while the target and raised amounts provide transparency and help build trust.

After that, pick a fill color for the thermometer so it stands out on your page.
You can also add a second fill color if you want a subtle gradient effect.

Finally, adjust the number formatting to keep your amounts clean and easy to read.
This includes setting your currency symbol (like $), choosing a thousands separator (, is easiest to read), and setting decimal places (usually 0 for whole numbers).

These simple adjustments are enough to create a professional-looking thermometer that clearly communicates your fundraising progress. But I recommend taking a look at the other settings and customizing them to your liking.
Once you’re happy with everything, click the ‘Save Changes’ button to store your settings.
Step 4: Add the Thermometer to Your Site
Now it’s time to put your fundraising thermometer where your visitors can see it. Since this plugin only displays a thermometer and doesn’t include a donation form, I recommend adding it to your sidebar for maximum engagement.
Sidebars are visible on almost every page, so visitors can easily track your progress while browsing your site.
To do this, go to the Appearance » Widgets from your WordPress dashboard. Once there, expand the Sidebar section, and add the ‘Shortcode’ block from the menu on the left.
Then, paste the following shortcode to display your thermometer.

After that, click the ‘Update’ button to store your settings.
This is how your fundraising thermometer will appear on your website.

Keep in mind that if you’re using a block theme, the classic Widgets menu won’t appear in your dashboard. In that case, head over to Appearance » Editor and open your Homepage template.
This will open the Full Site Editor on your screen. Here, click the + icon to open the block menu, and drag and drop the ‘Shortcode’ block wherever you want your thermometer to appear.

Paste the following shortcode into the block and click ‘Save’ at the top.
Now, you can visit your site to see how your fundraising thermometer looks.

Method 3: Add Fundraising Thermometer Using Formidable Forms (Best for Complex & Customizable Donation Forms)
If you’re looking to create more complex and customizable donation forms with fundraising thermometers, then Formidable Forms is the way to go.
It is an advanced form builder that lets you create all kinds of forms — from donation forms to event registrations, nonprofit signups, and much more.
It even comes with a Charity Tracker template, making it quick and easy to set up a fundraising thermometer while giving you full control over customization.

The only reason Formidable Forms is my third choice is that, unlike dedicated donation plugins, it isn’t solely focused on fundraising. If your main goal is just a donation form, it might be overkill.
However, it’s the perfect choice if you also need other complex forms, like volunteer applications or event sign-ups, or if you want to display fundraising data in advanced ways.
To learn more about its features, take a look at our detailed Formidable Forms review.
Step 1: Install And Activate Formidable Forms
First, you will need to sign up for Formidable Forms (Business plan or higher). This unlocks advanced features, such as the Visual Views addon and application templates, which you’ll need to show your fundraising thermometer.
Once you’ve signed up for an account, you need to go to your WordPress dashboard. Here, you must install and activate the free Formidable Forms Lite plugin. This free version is required as the base plugin for everything to work.
For a full walkthrough, check out our tutorial on how to install a WordPress plugin.
Then, go to the Formidable » Global Settings page and enter your license key. You can find this information in your Formidable Forms account on their website.

Next, head to the Formidable » Add-Ons screen in your WordPress dashboard. Here, you need to find the ‘Visual Views’ addon and switch the toggle to activate it.
This add-on is the key to displaying your donations in a beautiful fundraising thermometer. It takes the form data — including each donation — and shows it as a progress bar that updates automatically.

With Visual Views, you can fully customize how your thermometer looks and where it appears on your site, giving you both functionality and flexibility for your fundraiser.
Step 2: Add and Configure a Payment Gateway
Since you’re already in the Add-Ons section, I also recommend installing your preferred payment add-on.
This step is important because I’m going to show you how to create a donation form that comes with a built-in payment field. Connecting a payment gateway ensures that people can actually donate through the form.
Formidable Forms supports popular options like Stripe and PayPal, so you can choose what works best for your nonprofit or fundraiser.
For most users, Stripe is the easiest choice. It handles multiple payment types, like credit and debit cards, Apple Pay, and Google Pay, and keeps donations secure.

After activating the add-on, navigate to the Formidable » Global Settings » Payments page from the dashboard and click the ‘Connect to Stripe’ button.
You can now link your account to Formidable Forms.

Once completed, you’ll be redirected back to WordPress, and a green checkmark will confirm that your Stripe account is connected successfully.
Now, donations collected through your charity template will update your fundraising thermometer automatically.
Step 3: Use the Charity Tracker Template
Now, it’s time to install the Formidable Forms Charity Tracker Application Template. I’ve tried this template with a few demo campaigns, and it really cuts down on setup time.
It automatically creates all the components you need to start fundraising quickly:
- Donation and charity forms – to collect donor information and track donations.
- Thermometer, circle, and horizontal progress bar views – to visually display fundraising progress.
- Pre-built pages for donations and progress tracking – ready to publish or customize.
To get started, go to the Formidable » Applications page and find the ‘Charity Tracker’ template.
Here, click the ‘Add’ button.
This will open a popup, where you’ll need to click ‘Install Application.’

Once you do that, another popup will appear asking you to name your application.
You can use any name that helps you recognize your campaign later if you ever want to edit or delete it. After that, click the ‘Install Application’ button again to confirm.

Formidable Forms will now create your full charity tracking setup, which includes:
- Charity Details Form
- Charity Donation Form
- Charity Donation Horizontal Progress Bar
- Charity Donation Circle Progress Bar
- Charity Donation Thermometer Progress Bar
- Charity Donation Submission Page
- Charity Progress Trackers Page
Each of these components is already linked and ready to use. From here, simply click the ‘Open Application’ button.

This will take you inside your newly created application, where you can see your forms, pages, and progress bar views.
Step 4: Set Your Charity and Fundraising Goal
Now that your template is set up, it’s time to configure the forms that power your fundraising thermometer.
I recommend starting with the Charity Details form since this is where you’ll define your campaign’s name and fundraising goal.
To do that, go to the Formidable » Entries page. You’ll see both the Charity Details and Charity Donation forms already created for you.
Here, click ‘Edit’ under the Charity Details form to open it.

This will take you to a new screen where you can enter a Charity Name — for example, the name of your cause or campaign — and set your Charity Goal, which is the total amount you want to raise.
Keep in mind that this form is for internal use only. Visitors won’t see it, so it’s just for you or your team to manage and update.
Once you’ve entered your details, click the ‘Update’ button to save your settings.

Next, you’ll need to check the entry for the Charity Donation form. On this same page, click the ‘Edit’ link under the ‘Charity Donation’ form.
Here, make sure that the ‘Status’ field is set to ‘Approved’ from the dropdown menu.
This ensures that test or pending donations will appear correctly on your fundraising thermometer once they come in.
You don’t need to adjust any other settings in this form because it’s already set up to work with the Charity Tracker template.

Next, go back to the Formidable » Applications page. Now it’s time to customize your Charity Donation Thermometer Progress Bar.
Formidable gives you three styles to choose from: a thermometer, a horizontal bar, or a circle progress bar.
I prefer the thermometer view because it’s visually engaging and instantly communicates progress toward your goal.
Click the ‘Edit’ link under the Charity Donation Thermometer Progress Bar.

This will open the Formidable Views builder, where you can adjust the thermometer’s appearance.
From the left-hand panel, you can customize its typography, background color, border radius, padding, and more to match your site’s branding.
The best part? The thermometer is already linked to your donation form — so you don’t need to manually connect it or configure any extra settings.

Once you’re happy with how it looks, click the ‘Update’ button at the top to save your changes.
Step 5: Display Your Donation Form and Thermometer
Now it’s time to display your donation form and fundraising thermometer on your website.
To do this, go to the Formidable » Applications page and click the ‘Edit’ link under Charity Donation Submission.

This will open the block editor, where you’ll see that your donation form has already been added automatically.
Next, open the block menu from the left column and search for the ‘Formidable Views’ block. Drag and drop it into your page.

Once it’s added, use the dropdown inside the block to select the fundraising thermometer you created earlier.
When you’re happy with the layout, click the ‘Publish’ button at the top to save your changes.

That’s it — your donation form and fundraising thermometer are now live on your site.
I recommend visiting your WordPress site to preview the page and make sure everything looks the way you want.
You should see both the donation form and the fundraising thermometer displayed on the same page, updating automatically as new donations come in.

💡Bonus Tips to Boost Your Donations in WordPress
Now that your fundraising thermometer is live, donors can see your progress in real time.
However, there are a few more things you can do to encourage even more donations. I’ve found these tips really help make fundraising campaigns more effective:
- Enable Recurring Donations: Encourage donors to give automatically each month to create a consistent revenue stream.
- Activate Fee Recovery Options: Allow donors to cover transaction fees so that your nonprofit keeps the full donation amount.
- Create Urgency with Campaign Deadlines: Use clear end dates or countdowns to motivate faster donations as the goal approaches.
- Use Peer-to-Peer Fundraising: Encourage supporters to create their own mini-campaigns and share them with friends and family to expand your reach.
These tips can help you make the most of your fundraising efforts.
Frequently Asked Questions About Adding Fundraising Thermometers in WordPress
Adding a fundraising thermometer to your site is pretty straightforward, but I’ve been asked a few questions about how they work and what you can do with them.
Here are some quick FAQs to clear things up.
Does a fundraising progress bar update automatically when donations are received?
Yes! Most WordPress fundraising plugins, including Charitable and Formidable Forms, automatically update the thermometer in real time whenever a donation is made. This means your donors always see the current progress.
However, if you use a simpler tool like the Donation Thermometer plugin, you will need to update the amount manually.
Can I have multiple fundraising thermometers for different campaigns?
Absolutely. You can create as many thermometers as you need for different campaigns, each with its own goal, style, and placement on your site.
What payment methods does Charitable support?
Charitable integrates with popular payment gateways like Stripe and PayPal, making it easy to securely accept donations directly on your site.
Can I track offline donations in my fundraising thermometer?
Yes. You can manually add offline donations so that your thermometer accurately reflects all contributions, not just online ones.
Is there a limit to how many fundraising campaigns I can create with Charitable?
No. You can run multiple campaigns simultaneously, allowing you to manage and track different fundraising goals at the same time.
I hope this article helped you learn how to easily create a fundraising thermometer in WordPress. You may also want to see our guide on adding a PayPal donate button in WordPress or our tutorial on creating a donor portal in WordPress.
If you liked this article, then please subscribe to our YouTube Channel for WordPress video tutorials. You can also find us on Twitter and Facebook.