WordPress site speed optimization typically needs multiple plugins, technical configurations, and a Content Delivery Network (CDN)—likely more depending on your needs. My NitroPack review brings you cloud-based optimization for WordPress that combines almost everything you need to tighten your site’s speed. I’m going to examine whether it delivers on that promise and justifies its premium pricing.
NitroPack Review: Fast Facts
- NitroPack is a cloud-based WordPress speed optimization service that handles caching, image optimization, code minification, and an included CDN in a single solution.
- The cost starts at $7 per month on annual plans, which is a far more accessible price point than previous NitroPack pricing.
- The functionality focuses on boosting your Largest Contentful Paint (LCP) scores, optimizing image and video performance, and reducing your site’s initial load times.
NitroPack Review: Full-Throttle Pricing

You have four plans on offer here that come with both annual and month-by-month pricing. I’m going to focus on the annual pricing, but the difference isn’t really too wide:
- Starter ($7 per month). This gets you a single-site license, bandwidth for 8,000 page views per month, a 5GB CDN, and the fundamental functionality you need to see better results.
- Plus ($18 per month). You can share your account with three team members on this tier, along with getting five times the number of page views and CDN storage.
- Pro ($83.01 per month). At this tier you can have ten team accounts and NitroPack licenses for three sites. You also have 540,000 page views and 270GB of CDN storage per month.
- Agency ($229.17 per month). If you have more than ten websites to optimize, check this plan out. You’re able to set a custom number of pageviews and define your own CDN storage size.
In simple terms, budget-conscious site owners will find the Starter plan most appealing. Bloggers, small businesses, and similar sites will likely be in this bracket. In comparison to the previous pricing strategy of NitroPack, this represents a way to jump on board that’s better for your budget.
The Plus plan’s balance of functionality and resources can suit if you’re outgrowing your current options. It’s also going to be a plan if you’re non-technical yet want comprehensive optimization without juggling multiple plugins and services. At this tier you also get e-commerce cart cache optimization.
I suspect the Pro and Agency tiers will be more for businesses that handle multiple client websites, such as developers or design agencies. It’s at this point the cloud-based approach will show its value thanks to its host-agnostic consistency.
NitroPack Review: The Benefits of Cloud-Based Optimization
Typical caching plugins will only handle that aspect in the first instance. Many believe that’s all you need to zip up the search rankings. However, you often need multiple plugins to assist in different areas:
- Image optimization. This is primarily about making images small enough to load fast, but it can also cover resizing, metadata editing, and serving the right image for the user’s device viewport.
- Global content delivery. To serve a consistent and fast site across the globe you need to link it to a CDN. This can need a separate plugin, although you can find it as an option in other caching solutions.
- Minification. Much like your images, your asset files will need to be more optimal. The focus for WordPress is minifying CSS and JavaScript files.
There are also some facets that can be important for your LCP scores but might not be a feature within your plugins of choice. Cookie-aware optimizations and delivery, or prefetching and preloading of assets, for instance.
Using multiple plugins can be a sound strategy, but you have to worry about efficiency, compatibility, and having the right blend of functionality to be useful. This is where a cloud solution can help. It can intake your entire site’s files, images, and other assets, then carry out a full optimization to further send them onto the right users.
NitroPack Review: What NitroPack Does and What Sets It Apart
NitroPack differs from the norm. It replaces your entire optimization stack with a single solution and adds further functionality on top to give you a complete tool within one interface.

The service implements dozens of speed optimization techniques for you, which you can break down into the following areas:
- Caching. NitroPack includes automatic cache warmup, smart invalidation, and device-aware caching that will customize itself based on user devices and cookies. It’s a more complex way to cache pages through tracking content changes and invalidating only related cache files.
- Image optimization. The plugin will handle automatic resizing, WebP conversion with fallbacks, and adaptive sizing that optimizes images to fit different device displays. The system applies both lossy and lossless compression while maintaining its quality.
- Code refinement. You can minify and compress HTML, CSS, and JavaScript files while implementing critical CSS optimizations that prioritize above-the-fold content. A resource loader will auto-manage how assets load for a faster user experience.
- A built-in global CDN. NitroPack uses Cloudflare’s infrastructure with servers across over 120 countries. This will ensure you delivery content worldwide with GZIP and Brotli compression plus HTTP/3 compatibility.
Because NitroPack is cloud-based, the processing has some positives over the more common server-type processing. For example, optimizations happen on NitroPack’s infrastructure rather than consuming your hosting resources. This can give you more powerful algorithms than what’s possible on shared hosting and provide greater performance consistency regardless of your hosting quality.
NitroPack Review: Installation and Setup Process
Setting up NitroPack involves a couple of different ‘tracks’ to get everything ready. For starters, you’ll want to sign up for an account so you can access the dashboard, then add a site. Within WordPress, you’ll have to install and activate the NitroPack plugin to link your account.

As long as you do both of these steps, the order doesn’t matter. Signing up on the NitroPack website and adding your WordPress site made more sense to me.
It’s worth noting that you can signup for a free NitroPack account and choose your premium plan from the Add New Website dialog page. However, remember to select the WordPress option as NitroPack runs on various site platforms:

Within WordPress, you have a one-click option to connect your site, and for me it took seconds to complete:

At this point you can begin to start digging into what NitroPack gives you.
Using NitroPack
The NitroPack dashboard within WordPress has a lot going on, such as a basic settings panel and some other tweaks. However, the Optimization mode panel is where you’ll want to look:

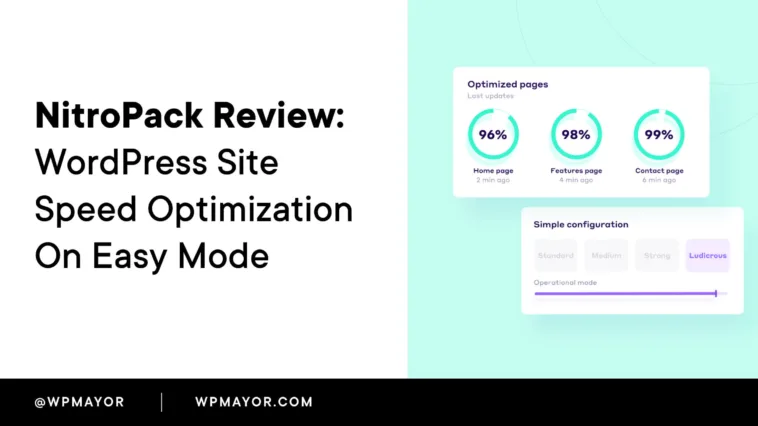
Instead of configuring dozens of individual settings, you can click one of five presets that toggle various options within the plugin: Standard, Medium, Strong, Ludicrous, and Custom.
The default is Strong as it provides almost all of the benefits and reduces the image quality to 80 percent, which shouldn’t be noticeable to most users. There are more details on what each mode toggles if you click the See modes comparison link:

The NitroPack dashboard also contains the optimization presets but includes much greater scope for tweaking your installation within the Cache Settings > General screen:

At this point, you have nothing more to do. NitroPack will take care of your site’s optimization in the background, while you can use the various analytics on the dashboards to keep tabs on the overall performance.
NitroPack Review: Performance Testing Results
WP Mayor has previously looked at NitroPack’s impact through testing. While this data comes from an earlier test, it does demonstrate the types of improvements you can expect:
| Before NitroPack 🐢 | With NitroPack 🚀 | |
| Time to first byte | 0.722 s | 0.742 s |
| Largest Contentful Paint | 2.123 s | 0.970 s |
| Cumulative Layout Shift | 0.006 | 0 |
| Total Blocking Time * | 0.174 s | 0.033 s |
| Document Complete Time | 3.063 s | 1.598 s |
| Document Complete HTTP Requests | 88 | 9 ** |
| Document Complete Size | 1.45 MB | 0.48 MB |
| Fully Loaded Time | 3.161 s | 2.457 s |
| Fully Loaded HTTP Requests | 89 | 46 |
| Fully Loaded Size | 1.45 MB | 0.85 MB |
This test used the WebPageTest site with a mobile-first configuration (an iPhone 8 and throttled LTE connection) and took median values from multiple test runs. As you can see, LCP load times are improved, Total Blocking Time is lower, and initial HTTP requests were heavily cut. Not only that, but the page size shrunk, which you’d expect given the level of optimization!
The results at the time were better PageSpeed Insights scores, which translates into reduced bounce rates, better Core Web Vitals scores supporting SEO rankings, and enhanced conversion potential through faster interactions.
Understanding the Performance Optimization Claims
NitroPack’s resource loading approach moves certain processes off the main thread and delays JavaScript execution in its most aggressive mode. This is different to some other optimization tools. In some cases, this can make a site appear unusually fast and might give you a cause for concern.
However, this criticism misses the point. The solution is to examine the field data through Core Web Vitals reports rather than relying solely on ‘lab’ scores.
In my opinion, NitroPack’s optimization techniques are sophisticated and deliver real improvements. In fact, real-world users note the impressive results they get using the plugin. I’m going to talk more about the user feedback in the next section!
NitroPack Review: Support and Documentation Quality
I’m going to start with the user support because of the reaction of NitroPack’s users. First, you can find a live chat window within both dashboards.

I haven’t had to use the support but I’m lead to believe it’s fast and helpful, especially if the reviews on Trustpilot are any indication:
“…Delia from NitroPack did an excellent job of giving me the support I needed to get NitroPack set up correctly on all three websites. The results are fantastic…” – Herbert
This is a common thread when it comes to the reviews:
“…The support worked very well. Alina got in touch directly and I only had to wait a short time for a follow-up response. In the end, all problems were solved without complications…” – Alexander Hilgenberg
As for the written documentation, there’s a Help Center that covers installation, configuration, and troubleshooting scenarios with screenshots and step-by-step instructions for common tasks

I’m a fan of the Compatibilities section of the Help Center as it provides a wealth of articles to help integrate NitroPack with your third-party tools, services, and hosts. Overall, it should give you a sense of comfort that the support is ready and waiting if you need it.
NitroPack Review: My Final Thoughts
WordPress optimization can be complex but NitroPack offers a straightforward way to implement lots of tiny changes that add up to a huge whole. I’d argue the pricing for higher tier plans is the least positive aspect as it can be expensive, although the Starter plan is great value. Still, this is relative to the functionality you have at your disposal—not to mention the time, headspace, and resources you’ll save thanks to the top UI and UX.
Related Articles
Has this NitroPack review offered you a new twist on your site optimization? I want to hear your experience in the comments section below!